This app uses django rest framework to import csv files into the TeamScore Model on the backend. It is utilizing a postgres backend as well as a redis server to implement caching. It is also using HTMX for forms that enable team score objects to be added, edited and deleted. The front end utilizes bootstrap 5.
Below are the links to the documentation that was referred to in implementing this webapp:
HTMX for forms : https://htmx.org/
redis for caching : https://redis.io/
HTMX forms were implemented instead of standard Crispy forms to utilize immediate page updates without any refreshes using just HTML and minimal javascript instead of writing custom AJAX, Websockets or Server Event scripts.
To start the webapp manually, please have a redis server runnning and check your port connection to make sure it matches with the configurations on the .env file under the Cache section. If you are on a mac you can use homebrew and run:
brew install redis
brew services start redis
Test your connection by keying in PING, you should receive PONG as an output.
All sensitive information such as database password, secret keys and allowed hosts have been decoupled using python-decouple. These are stored in the .env file. Attached to this repository is a sample .env.example file, please rename this file to a .env file with your db parameters, secret key and allowed hosts.
Once redis is running, and a postgres db, db username and db password has been set up. Clone the repository and update the .env file with the appropriate settings, if you are in need of generating a secret key for the django web app you may retrieve one from : https://miniwebtool.com/django-secret-key-generator/
Create a python3 virtual environment in the root directory of the application, it is best to stick to the root directory as when this application is pushed to the production or staging server and is utilizing the Jenkinsfile for automated deployments, it is configured to look for the python virtual environment in the root directory (or you may choose to update this).
To create a virtual environment and activate it on a Mac:
python3 -m venv ./venv
source ./venv/bin/activate
Once your virtual environment has been activated you may install all libraries and dependencies for this application from the requirements.txt file.
pip install -r requirements.txt
To ensure that your static files are collected and a static folder is created in the root of your application run:
python manage.py collectstatic
When prompted key in Y for “Yes”
You should see a static folder in the root of your local repository
Next, run all migrations to ensure your tables are created in the database which you connected to using your .env file setup.
python manage.py makemigrations
python manage.py migrate
Run the following commands and input your desired username and password:
python manage.py createsuperuser
You may now run:
python manage.py runserver
Hit Ctrl + C to stop your server from running the application locally.
In case you would like to get a view of how mobile responsive the application is and how it works from a mobile device or an ipad. You may choose to run the application on your ip address at port 8000.
On a mac get your ip address by running:
ipconfig getifaddr en0
You should get your public IP address in this format :
190.16x.7x.1xx
Add this IP address to your ALLOWED_HOSTS in your .env file.
Now run the following command on your IP address at port 8000:
python manage.py runserver 190.16x.7x.1xx:8000
Your phone or ipad should be connected to the same WiFi your laptop is connected to. You may view the app on your mobile browser using this link:
190.16x.7x.1xx:8000
This application also uses Python’s default basicConfig logging, to log events for the API. You can find these outputs in the logging.log file generated. Refer to this for tracebacks should there be any errors with the core API to import CSV files.
To run tests:
python manage.py test
Logging is also implemented for tests, the output can be found in testing.log. All test files are found in individual app folders, they were not compiled into a single folder due to time constraints.
The attached Jenkinsfile assumes that there will be both a staging and production server assuming nginx and gunicorn will be used to serve the webapp.
To run the docker image of this application, install docker into your local environment
You may refer to their documentation : https://docs.docker.com/desktop/install/mac-install/
Once you have docker installed, it is important that you change these parameters on your .env file to follow the name of the service for postgres and redis on the docker-compose file.
DB_HOST=db
REDIS_HOST=redis
To build an image of the application run:
docker compose build
docker compose up -d
docker-compose exec tigerlab python3 manage.py migrate
You may view the application running on docker at:
localhost:8000
docker exec -t -i tigerlab-app /bin/bash
To execute any commands to your docker container, for e.g. to create a superuser:
docker-compose exec tigerlab python3 manage.py createsuperuser
The command below will stop the tigerlab-app container but will not remove the container or the tigerlab image built from your build command previously:
docker-compose stop
If you wish to stop and remove the container and image, run the command below:
docker-compose down
If you have previously started the container without specifing the environment variables, volumes would be created for the default postgres db and your .env file will be skipped, to fix this remove the volumes attached to your tigerlab image
TO remove all volumes:
docker volume rm $(docker volume ls -q)
TO remove a specific volume:
docker volume rm $(volumename)
Due to time constraints, I was not able to improvise on the data fetch event for the dashboard page using htmx, right now it is triggered every 1 second to check for new file uploads. Ideally it should implement a data fetch on an event change like the analytics page does to reduce server load.
Caching could be implemented for the dashboard page as well. Right now it is only implemented on the analytics page. More tests could be done.
On the OUTPUT page and DASHBOARD PAGE, if a huge amount of data is loaded the tables will be an endless scroll with data lag, it is best to implement Pagination should there be a huge amount of data uploads, the pagination can be implemented in pages or an infinite scroll with AJAX calling on data as the user scrolls instead of a one time data dump.
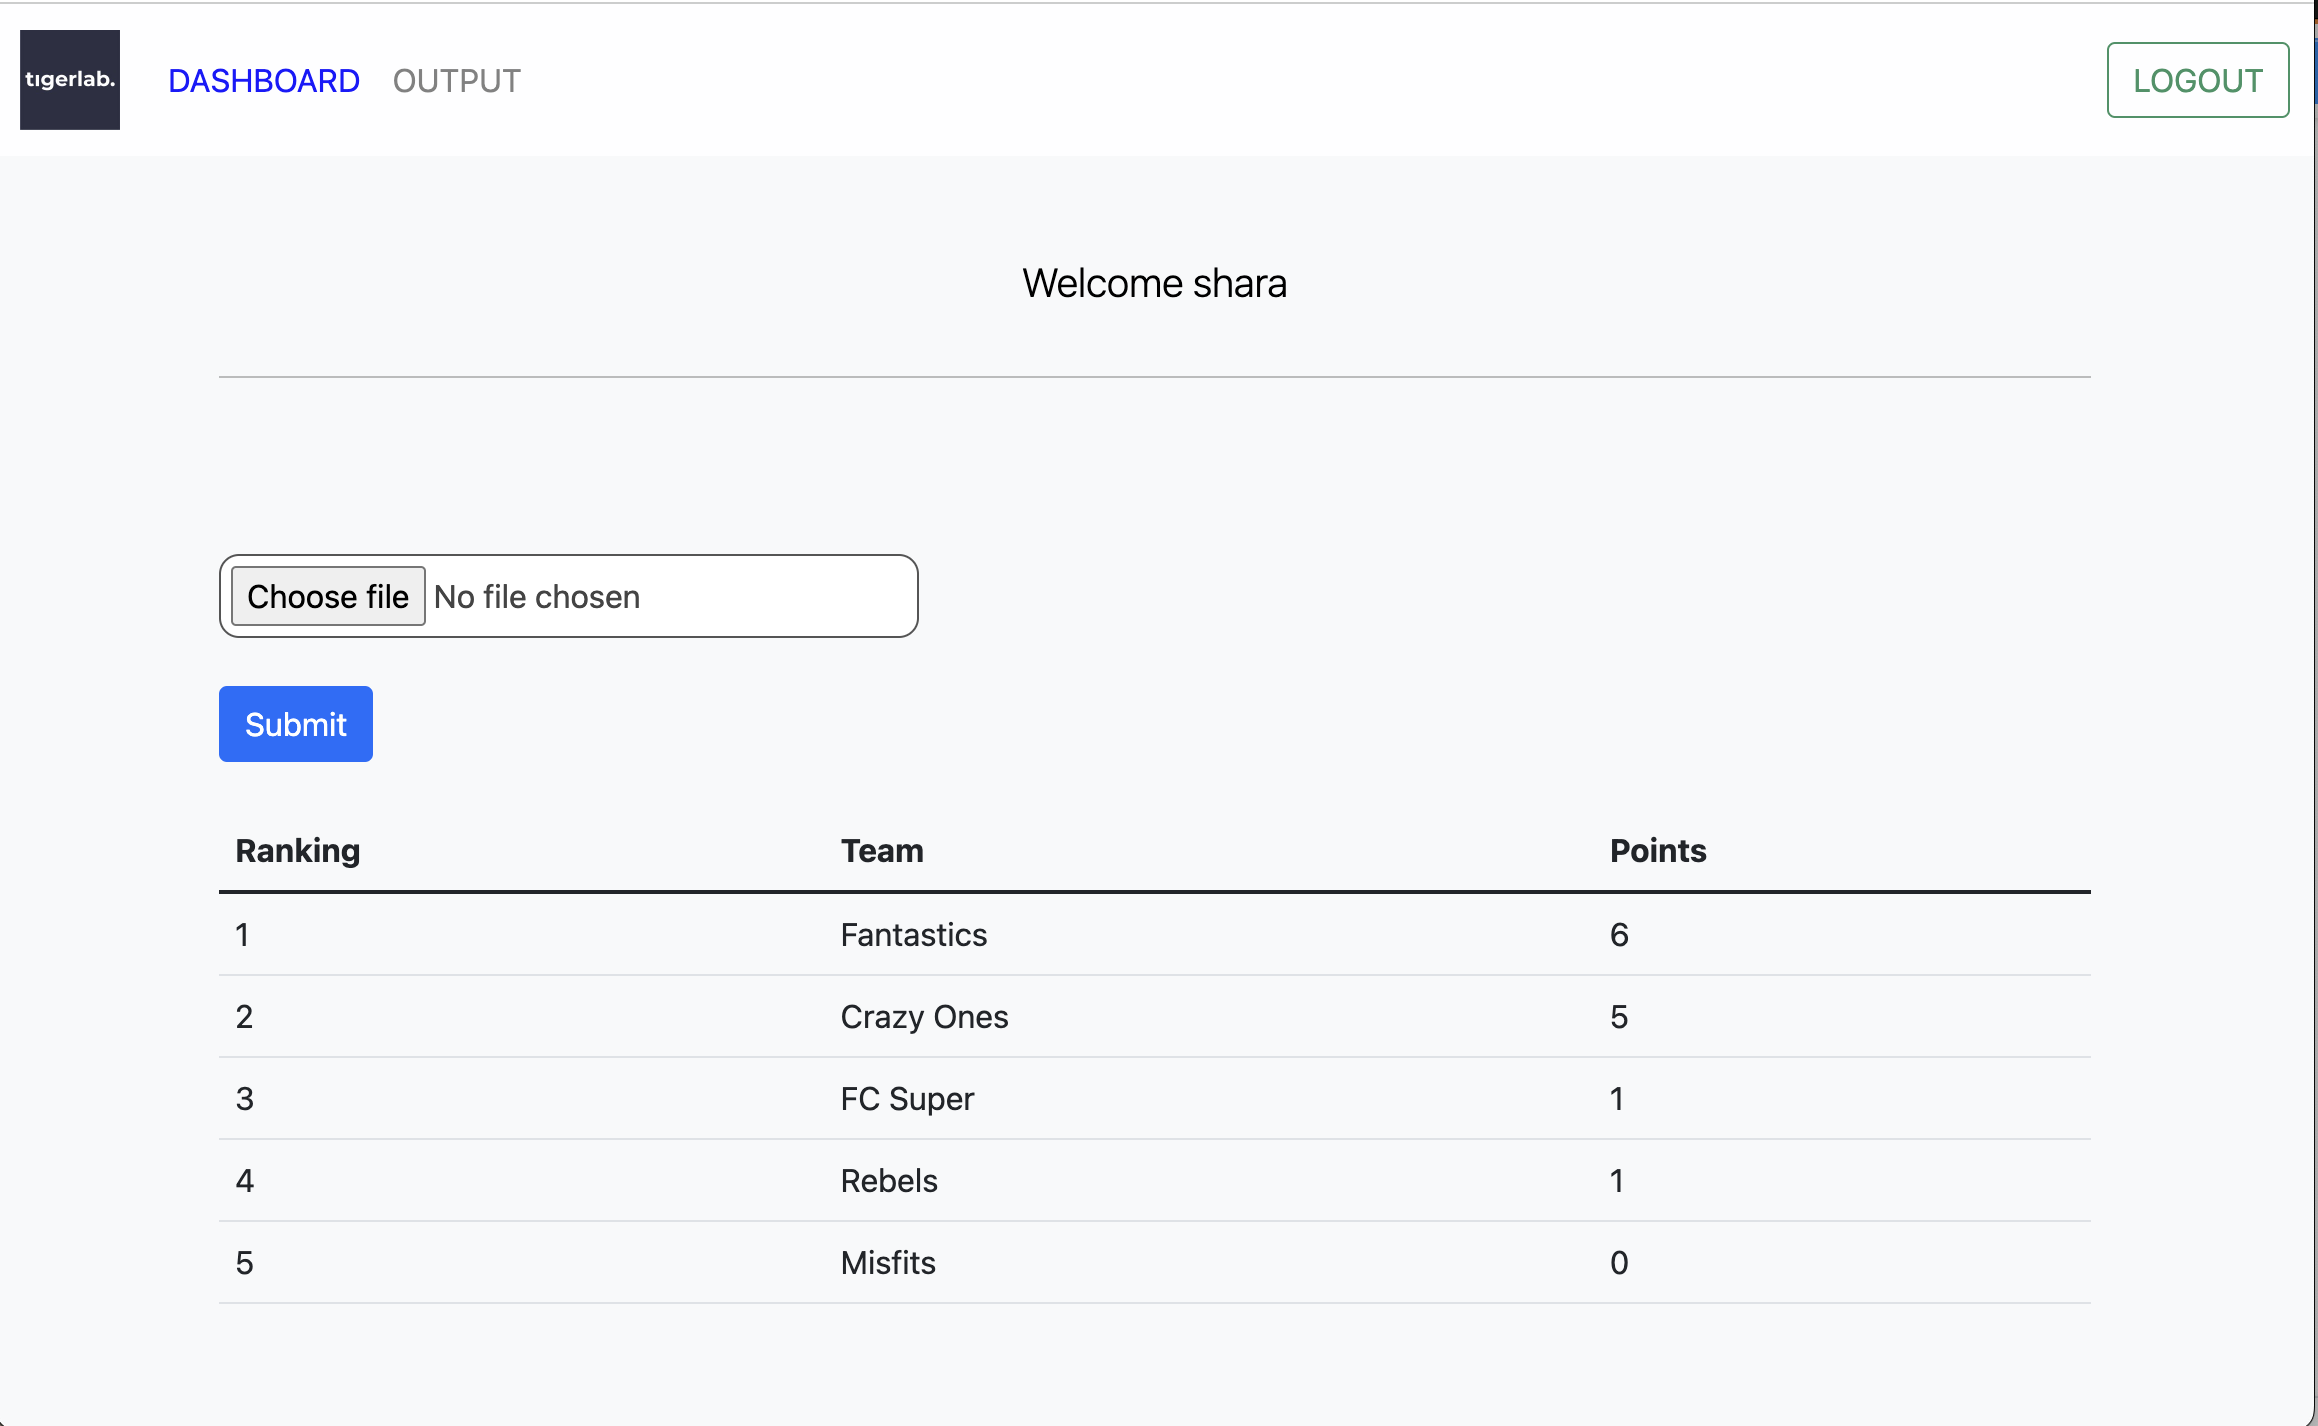
Dashboard for file submit, ranking, and points

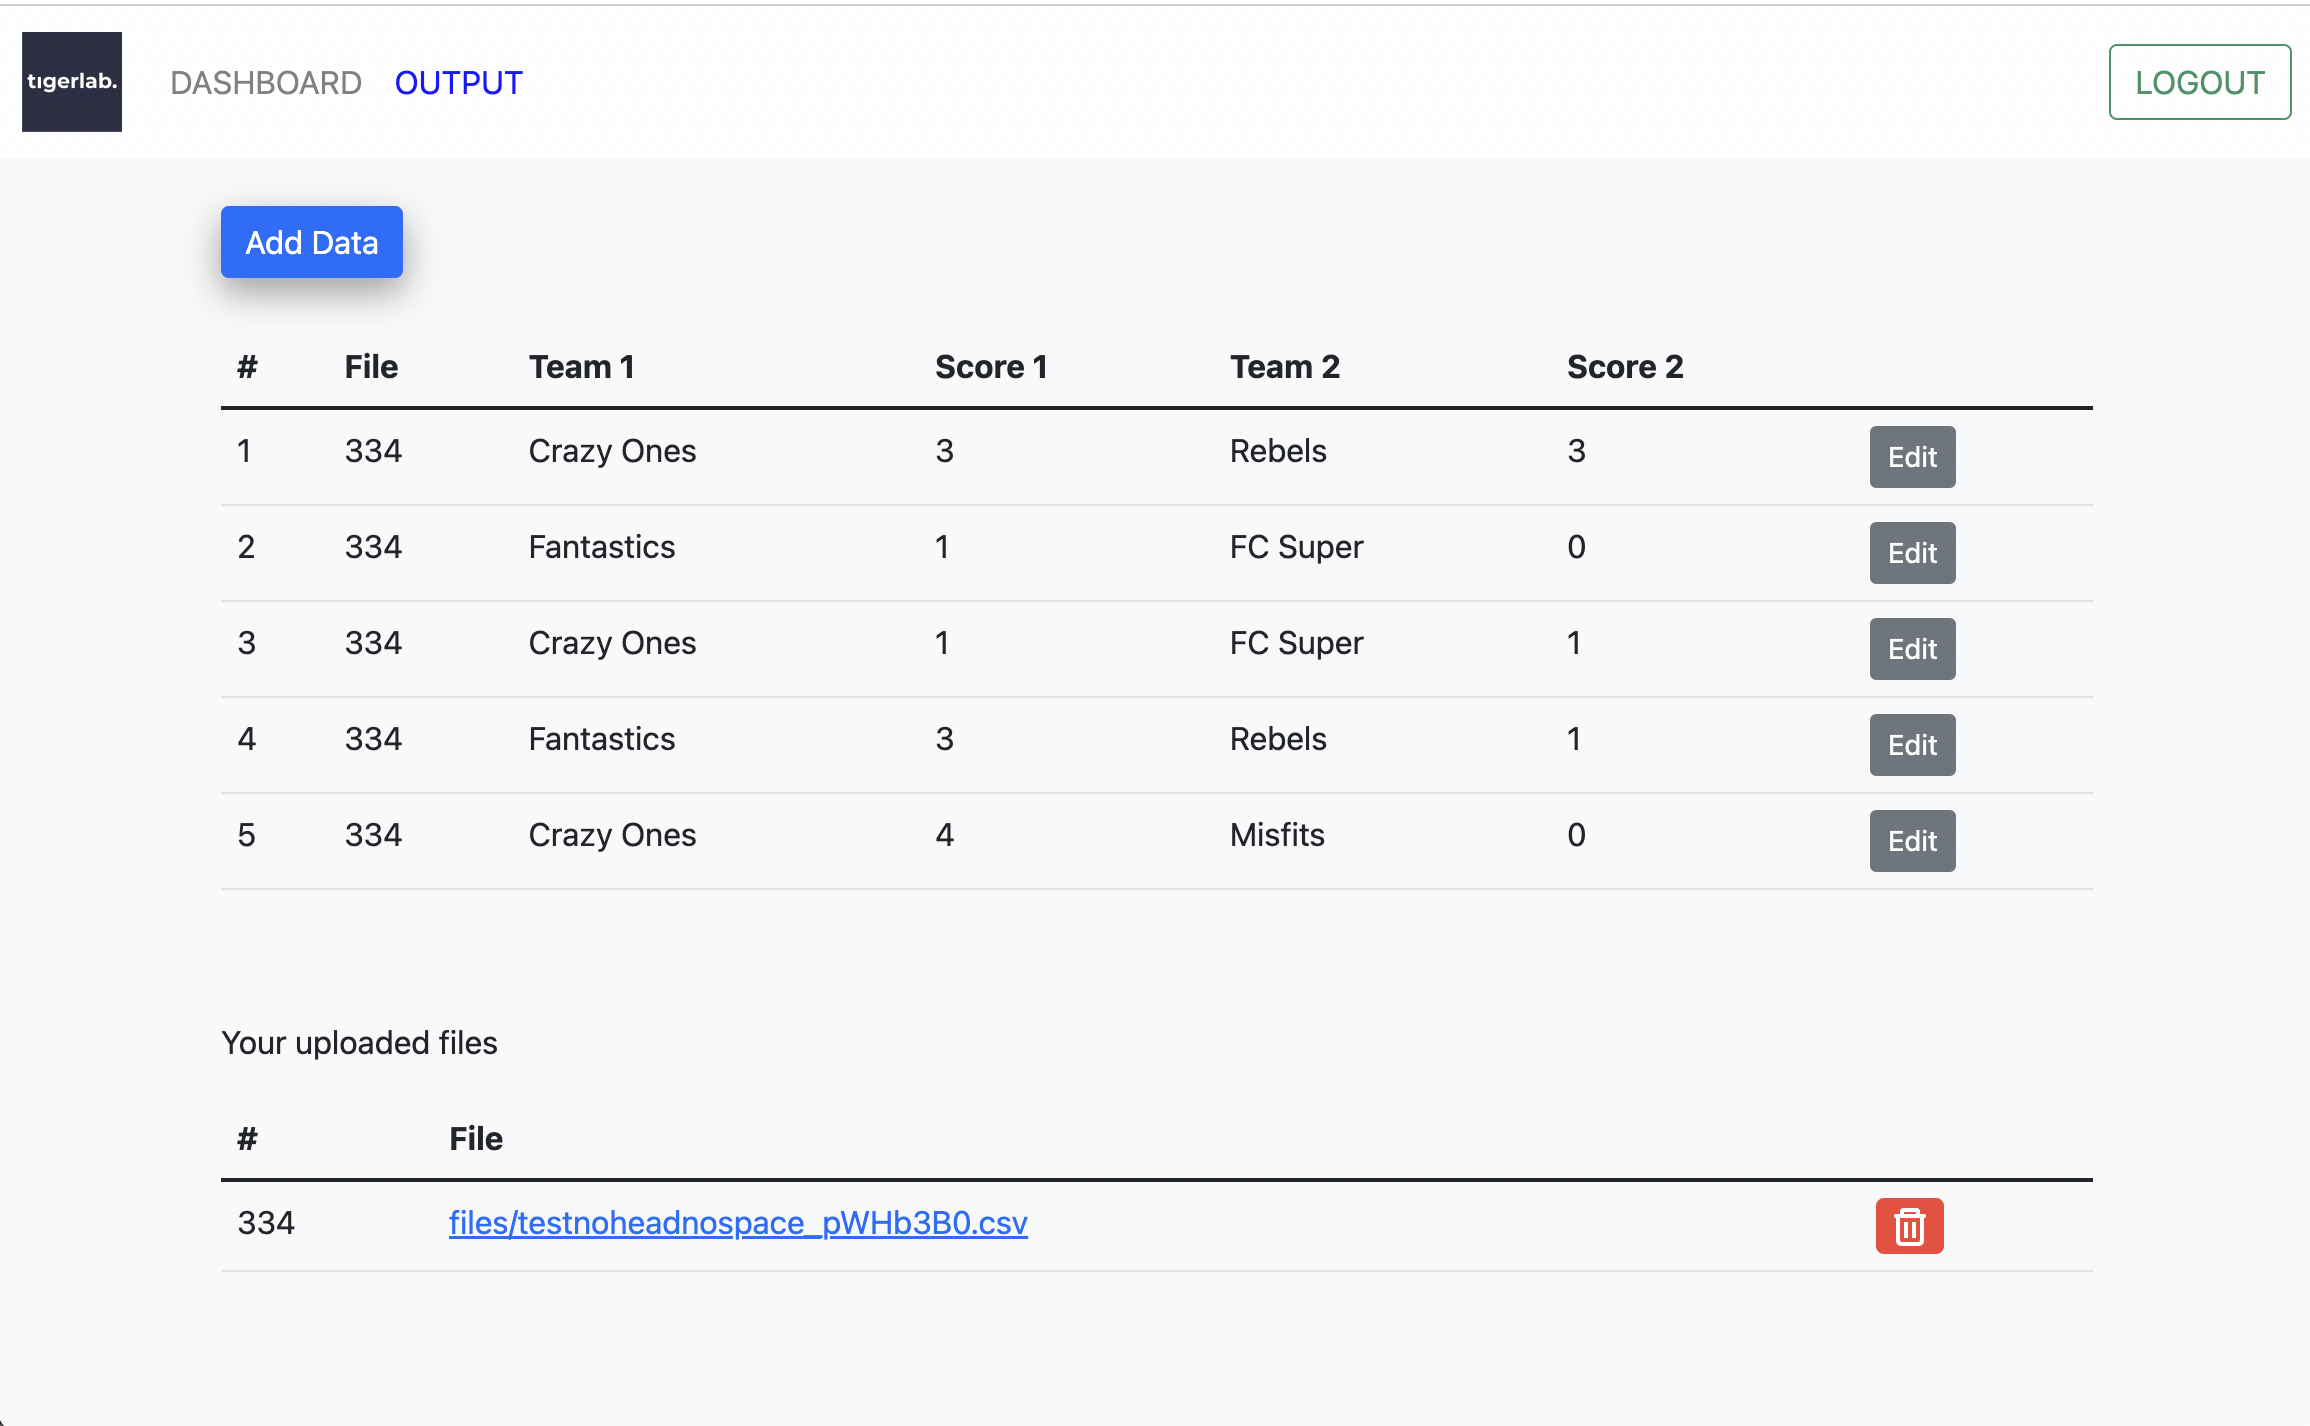
CSV File upload output

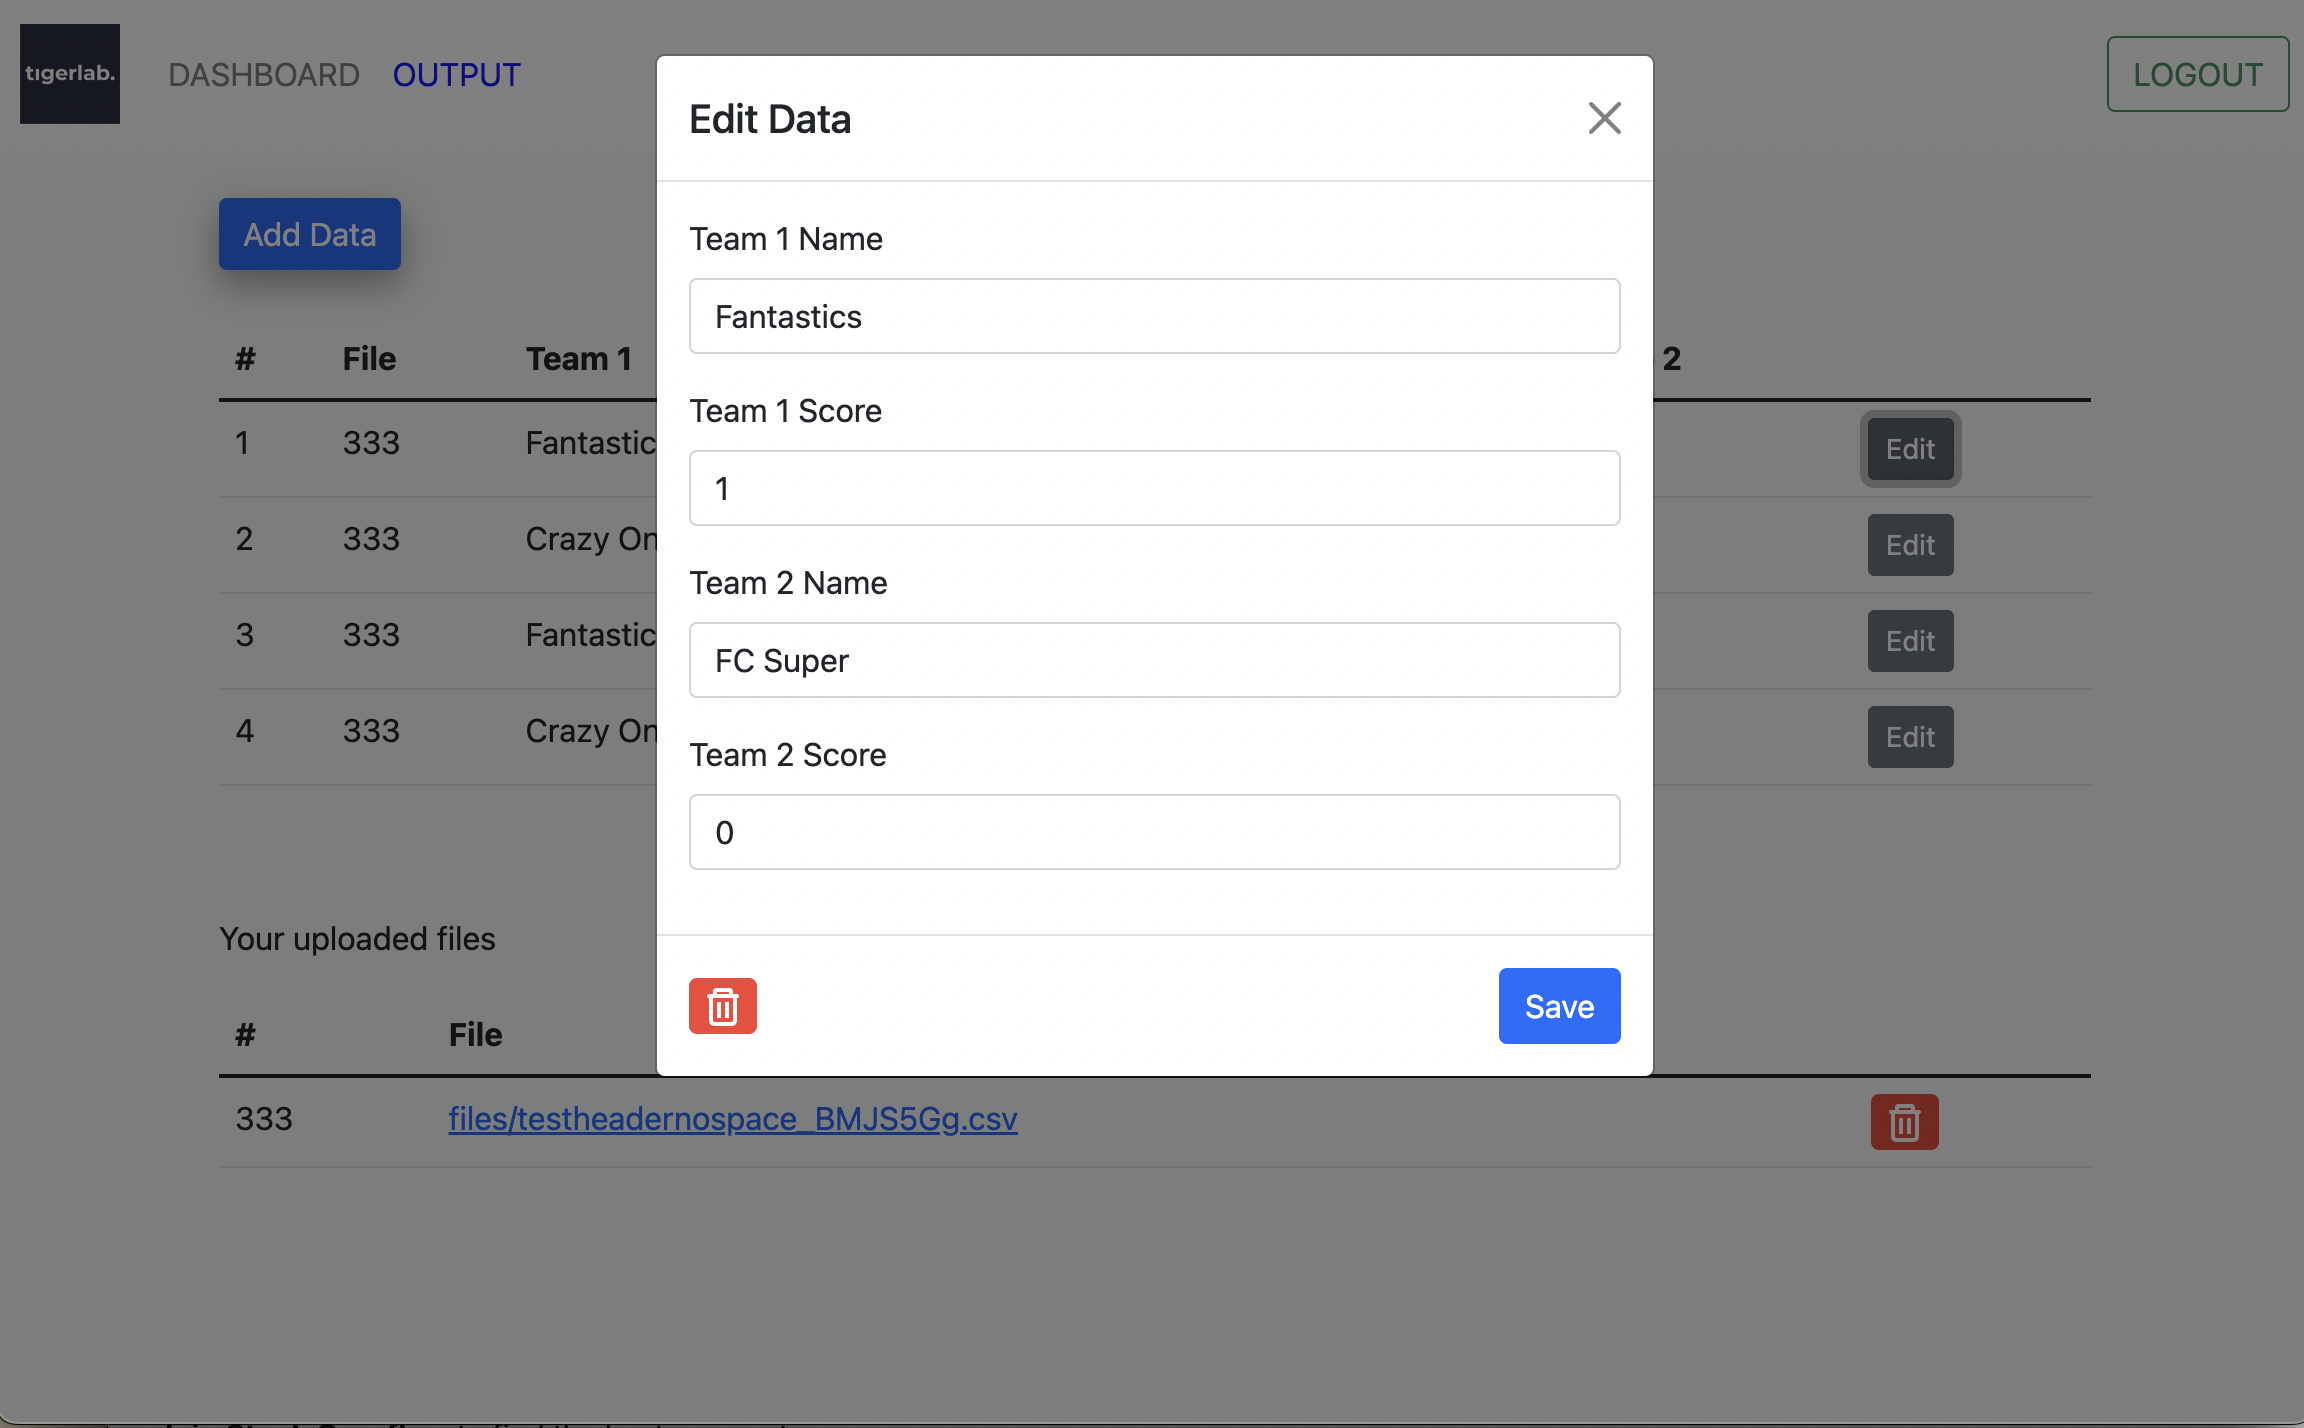
Edit Data Points

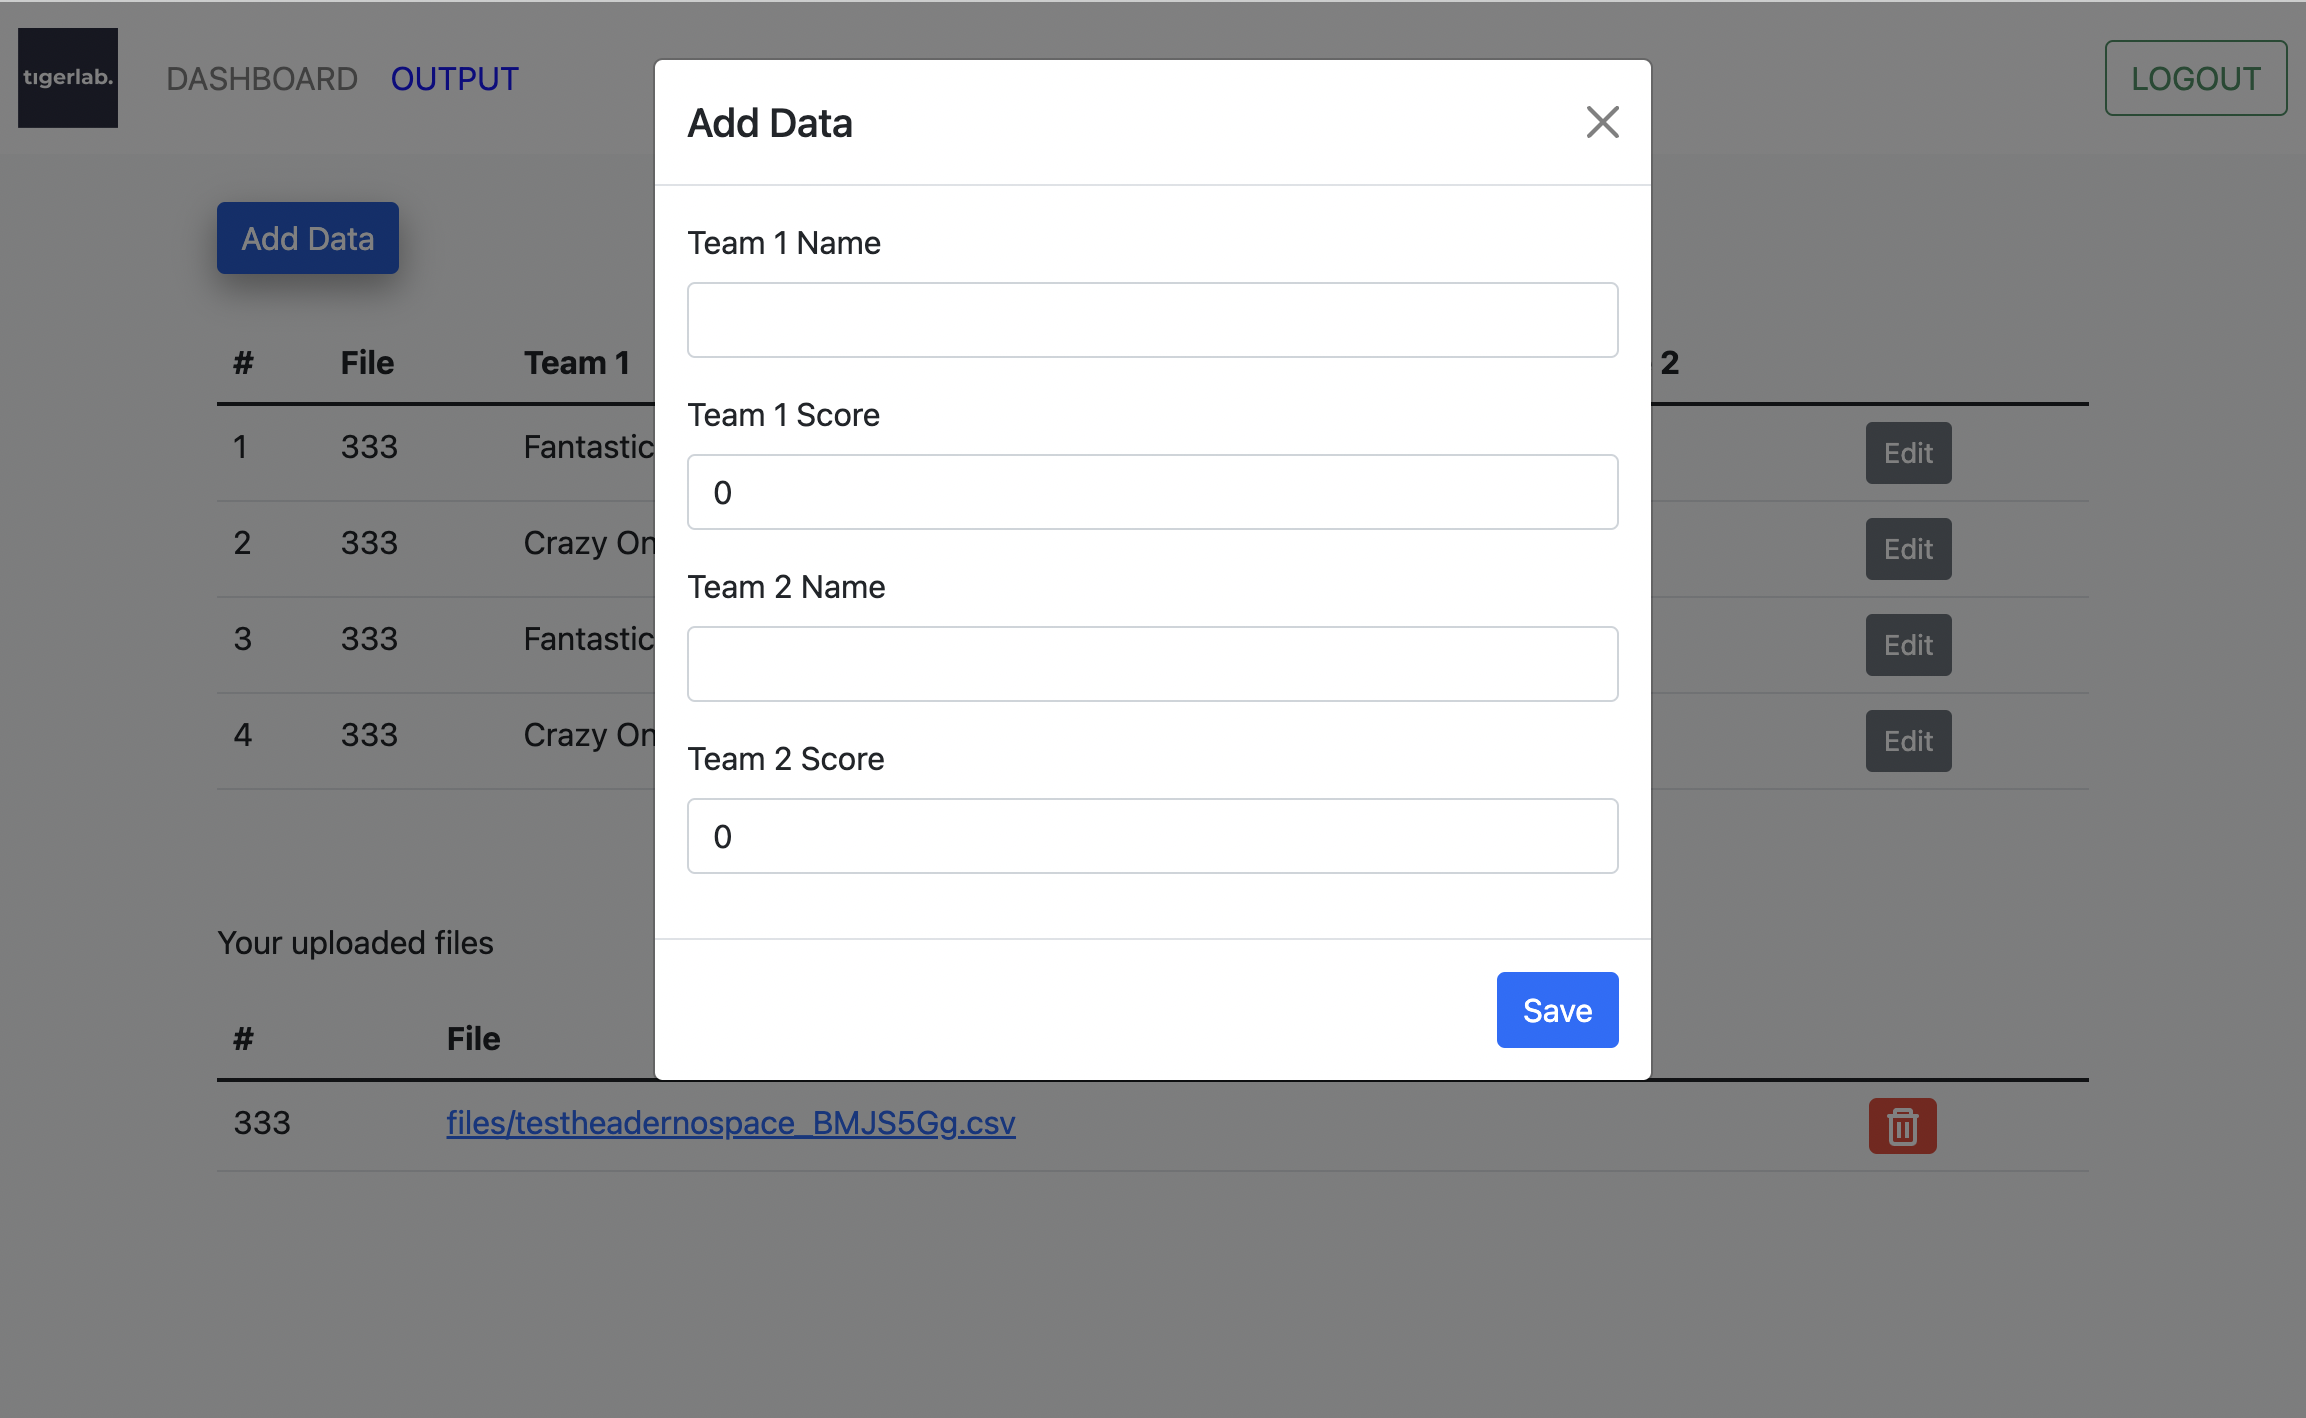
Add Data Points

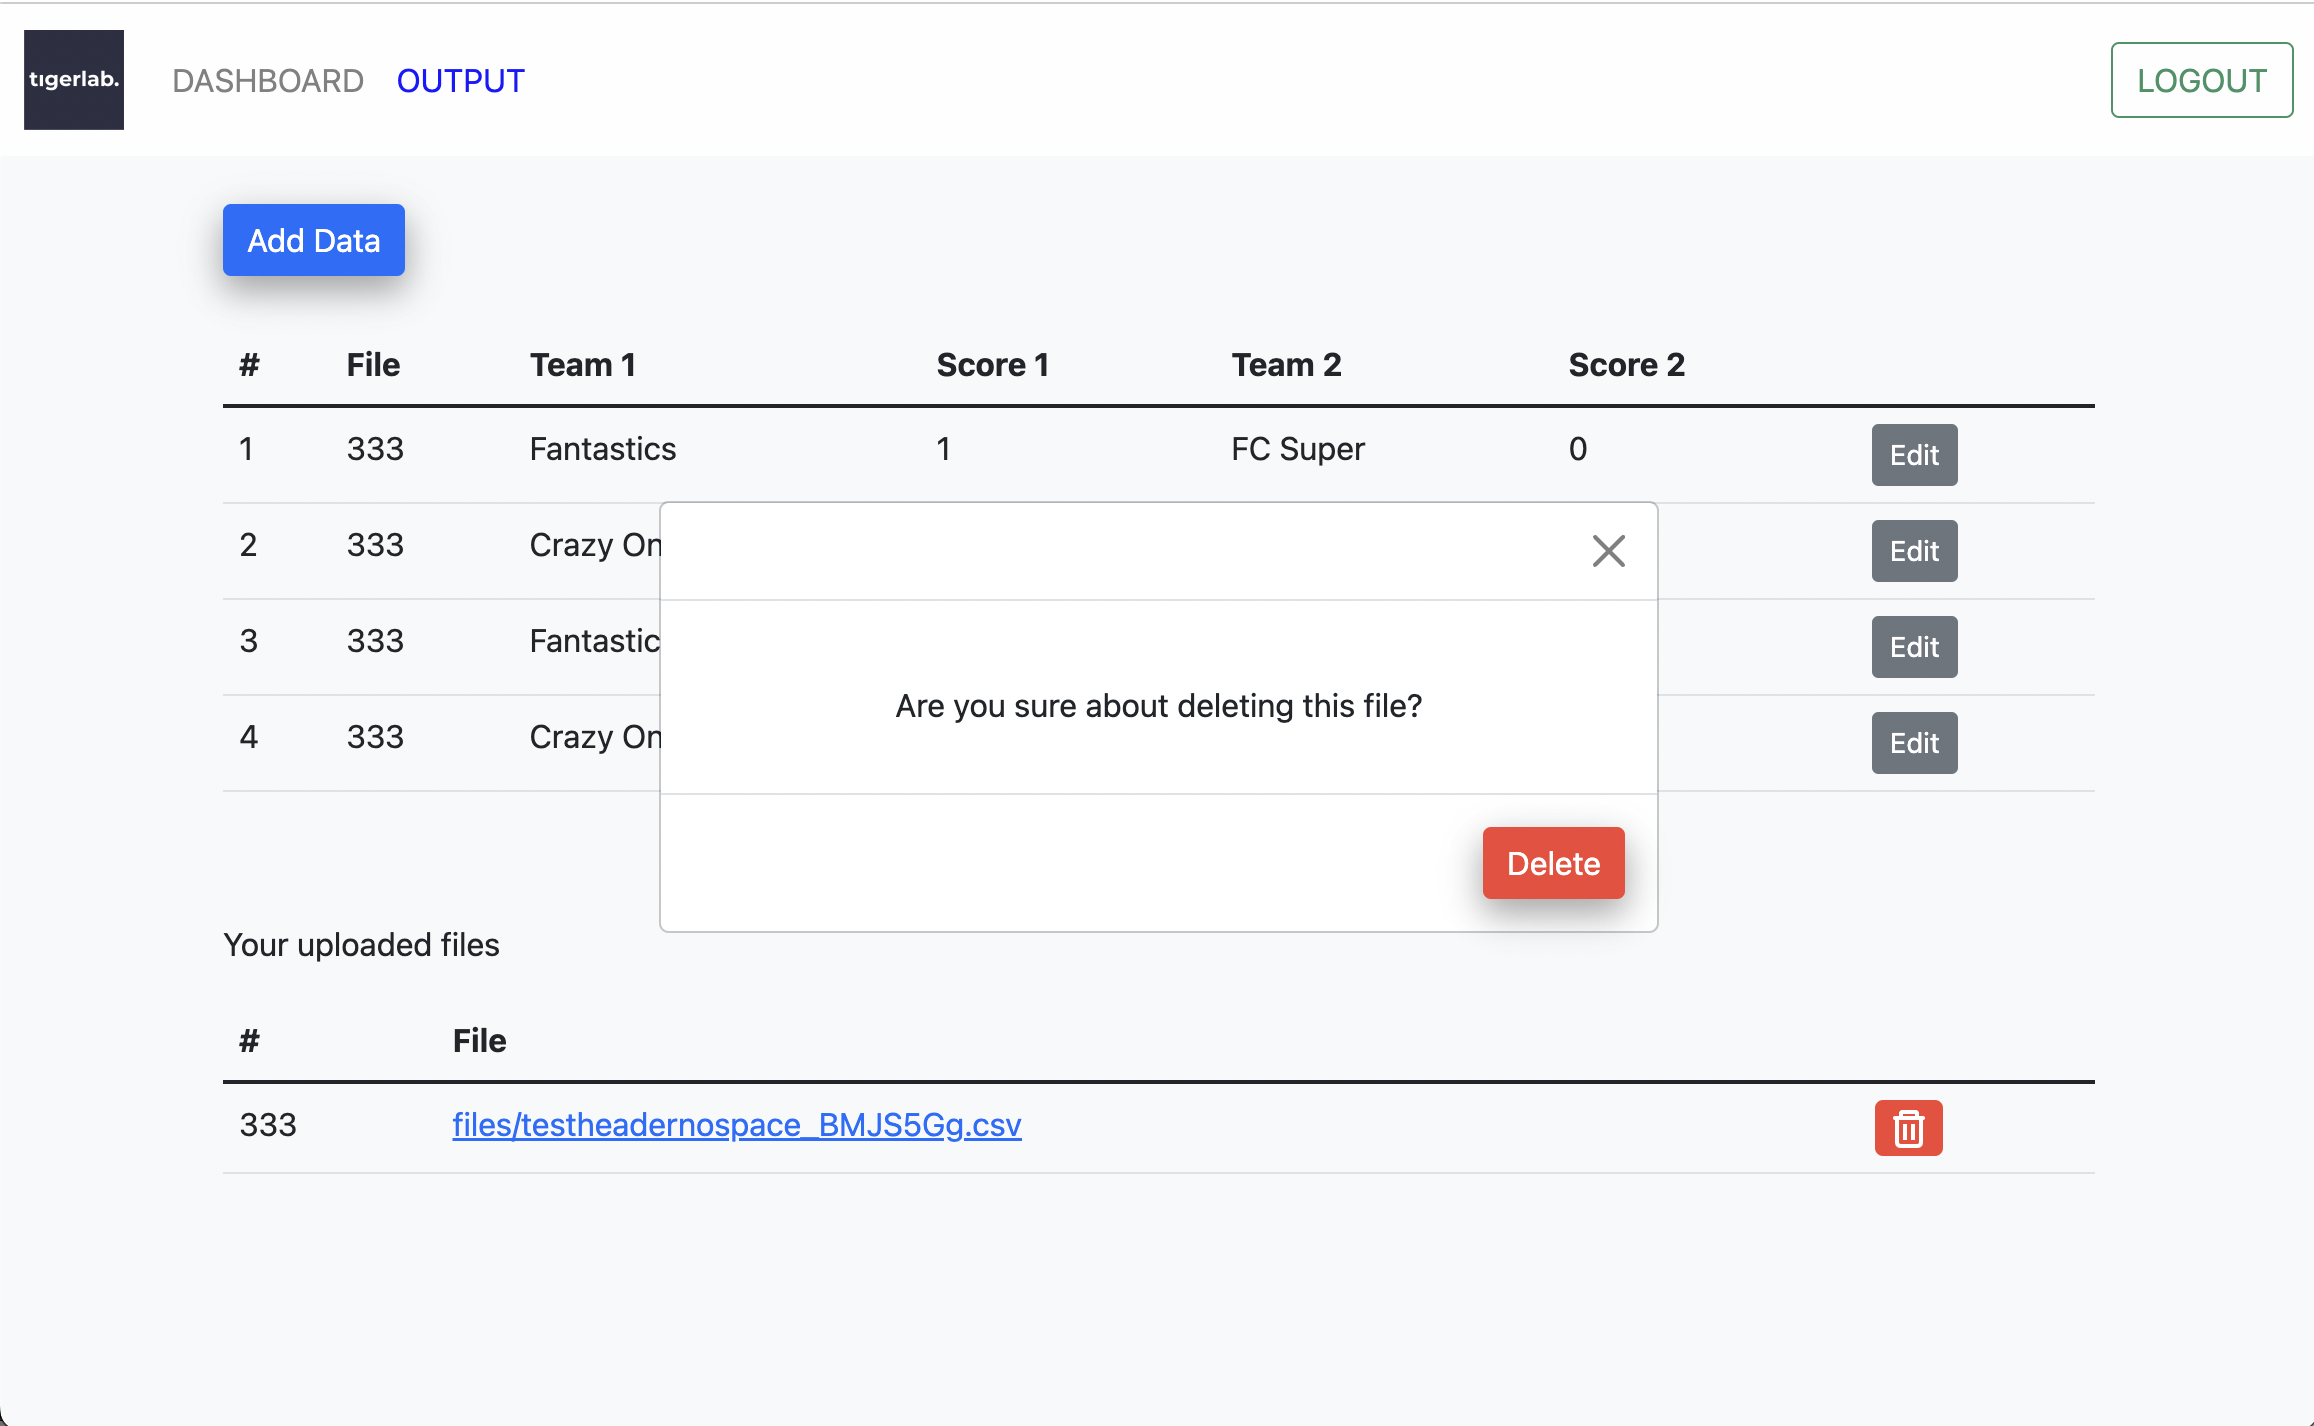
Modal pop up to confirm file deletes

Leave a Reply